Whip Up a Classic Cheddar Cheese Ball in Just 5 Minutes
Imagine this: a last-minute gathering, an impromptu game night, or simply a craving for something undeniably delicious and satisfying. What's the perfect solution that screams both effortless elegance and irresistible flavor? The classic
cheddar cheese ball. Forget complicated appetizers or store-bought imitations; we're talking about a homemade masterpiece that takes a mere five minutes of your time, using ingredients you likely already have on hand. This isn't just a snack; it's a nostalgic favorite, a crowd-pleaser, and your new go-to recipe for any occasion.
The beauty of a homemade cheese ball lies in its simplicity and the vibrant freshness it brings. While you might encounter fancier versions or gourmet blends, there's an unparalleled charm to a traditional cheddar cheese ball. It’s that familiar, tangy, creamy delight that everyone gravitates towards, whether served with crisp crackers, crunchy pretzels, or fresh vegetables. It’s the ultimate edible centerpiece that guarantees smiles and satisfied appetites, proving that sometimes, the best things in life truly are the simplest.
Why a Homemade Cheddar Cheese Ball is Always a Winner
In a world overflowing with complex culinary trends, the humble
cheddar cheese ball stands as a testament to timeless deliciousness. Why does this simple creation consistently win hearts and palates? For starters, the contrast between homemade and store-bought is night and day. A freshly prepared cheese ball offers a creaminess, a burst of flavor, and a customizable texture that pre-packaged options simply cannot replicate. You control the quality of ingredients, the sharpness of the cheddar, and the subtle aromatic notes, resulting in a superior taste experience every single time.
This classic recipe, often passed down through generations, embodies the essence of comfort food. It's the kind of dish that inspires fond memories of family gatherings and festive celebrations. While adventurous options like an Everything Bagel Cheese Ball or a creamy Chicken Spinach Cheese Ball have gained popularity, they often stem from the foundational success of the classic. It's a foundational recipe that proves that minimal effort can yield maximum impact.
The versatility of a homemade
cheddar cheese ball makes it an indispensable item for your entertaining repertoire. It effortlessly transitions from a casual Super Bowl party to an elegant holiday soirée. It's substantial enough to satisfy hungry guests but light enough not to spoil dinner. Plus, the act of making it yourself adds a personal touch that your guests will surely appreciate. If you're looking for more ideas to make your gatherings unforgettable, explore our article on
Homemade Cheddar Cheese Balls: Your Go-To Party Snack for endless inspiration.
The 5-Minute Magic: Core Ingredients & Simple Steps
The secret to this incredible
cheddar cheese ball is not some elaborate technique or rare ingredient, but rather a brilliant combination of accessible items and an astonishingly quick preparation time. You really only need five core ingredients and about five minutes to create a masterpiece that looks far more involved than it is.
The Essential 5 Ingredients:
- Cream Cheese: This forms the creamy base of your cheese ball. The most crucial tip here is to ensure your cream cheese is completely softened to room temperature. This allows for effortless mixing and a smooth, lump-free texture. Any variety of plain cream cheese (full-fat, reduced-fat) will work, but full-fat often yields the creamiest result.
- Cheddar Cheese: The star of the show! You'll need this for both the inside mixture and for coating the outside. While pre-shredded cheese is convenient, freshly grated cheddar from a block often offers a superior texture and flavor. Sharp cheddar will provide a more pronounced tang, while mild or medium cheddar offers a gentler, buttery profile. Choose what you love!
- Garlic Powder: This provides a foundational savory note without the moisture or intensity of fresh garlic. It blends seamlessly into the mixture.
- Minced Onion (Dried): Similar to garlic powder, dried minced onion offers a sweet, aromatic flavor that distributes evenly and contributes to the classic taste.
- Salt: Essential for balancing and enhancing all the other flavors. Start with a pinch and adjust to your taste.
The 5-Minute Assembly Process:
- Soften & Combine: In a large mixing bowl, ensure your cream cheese is thoroughly softened. Add the majority of your shredded cheddar cheese (reserving about 1/4 to 1/3 cup for coating), along with the garlic powder, minced onion, and a pinch of salt.
- Mix Thoroughly: Using a sturdy spoon, a spatula, or even an electric mixer on low speed, mix all ingredients until they are well combined and smooth. Pay attention to breaking up any large clumps of shredded cheddar to ensure a consistent texture throughout the ball. This is where softened cream cheese really shines, making the process quick and easy.
- Form the Ball: Lightly moisten your hands with a little water (this helps prevent sticking) and gently roll the cheese mixture into a compact ball. Aim for a relatively smooth, round shape.
- Coat and Finish: Take your reserved shredded cheddar cheese and spread it out on a plate or cutting board. Roll your newly formed cheese ball in the shredded cheese, pressing gently to ensure an even and attractive coating. This outer layer not only adds extra cheesy flavor but also provides a beautiful texture and visual appeal.
That's it! Your classic
cheddar cheese ball is ready to be devoured. One of the best aspects of this recipe is that it tastes incredible immediately, with no refrigeration time required. While it often tastes even better after a short chill, you don't have to wait to enjoy its creamy, tangy goodness.
Elevate Your Cheddar Cheese Ball: Creative Variations & Serving Suggestions
While the classic
cheddar cheese ball is perfection in its simplest form, it also serves as a fantastic canvas for culinary creativity. With just a few simple additions, you can easily transform it to suit different tastes or occasions.
Flavorful Add-Ins & Coatings:
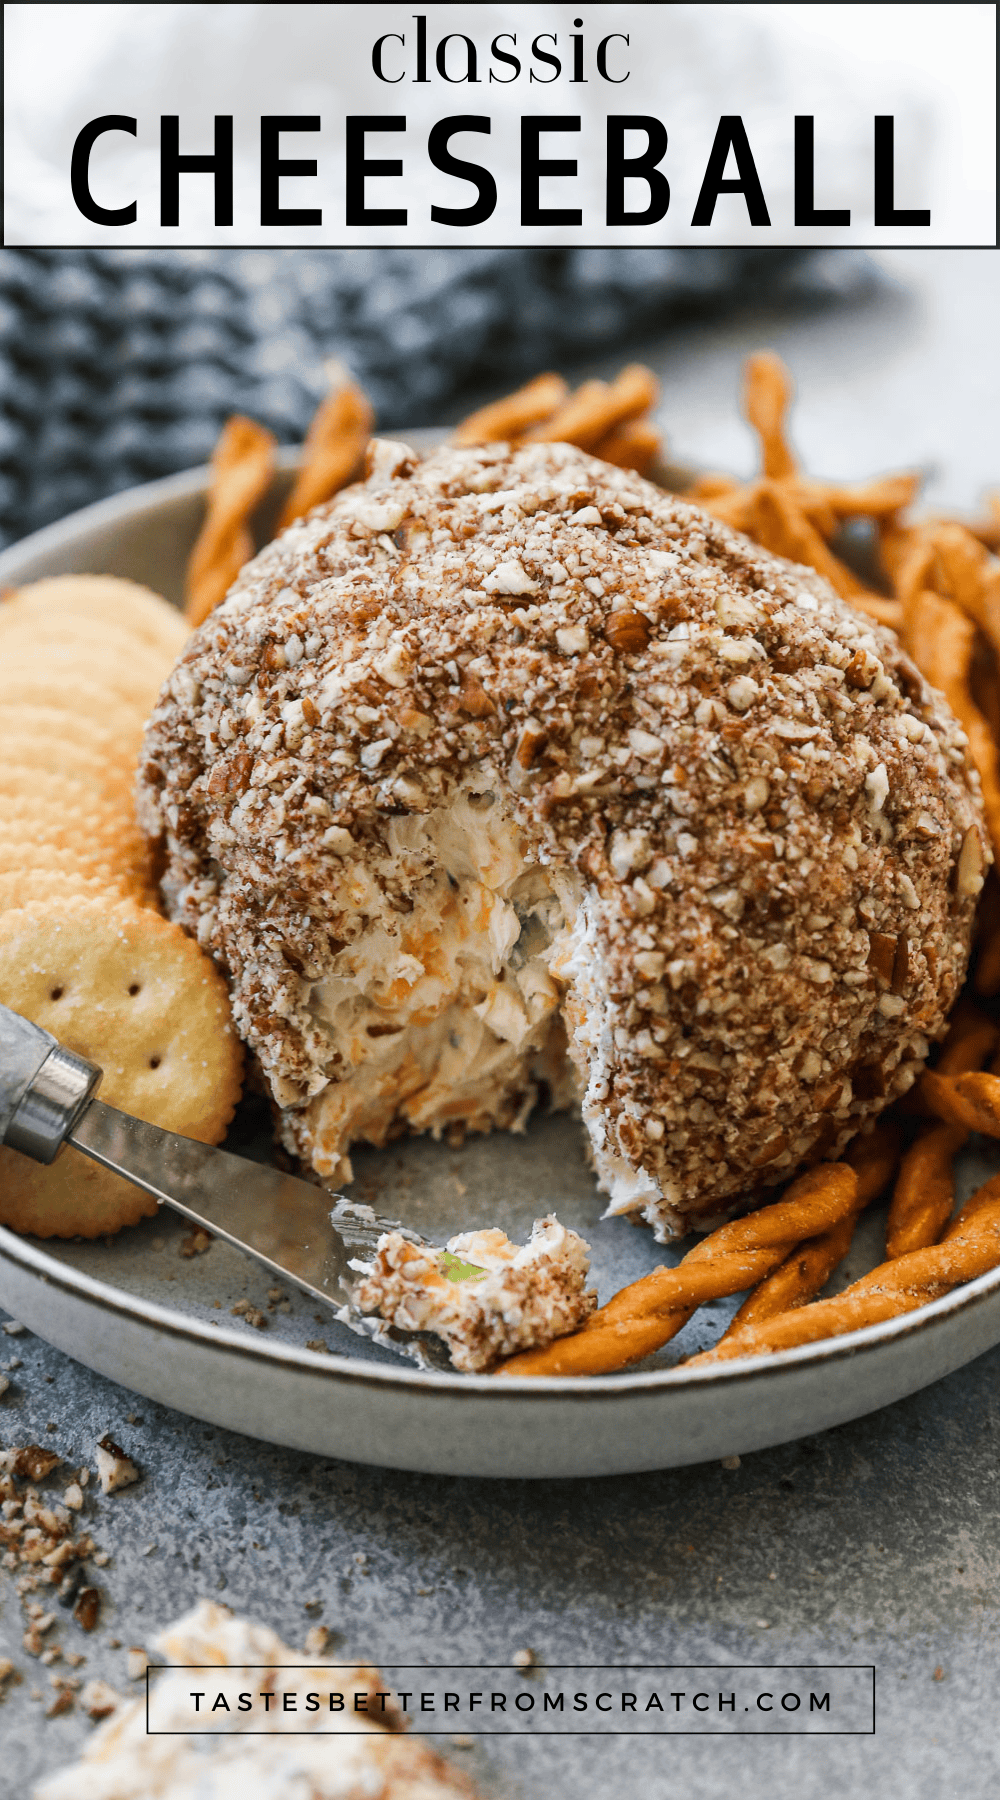
- Nutty Crunch: For an elegant touch and satisfying crunch, roll the finished cheese ball in finely chopped nuts like pecans, walnuts, or almonds. Toasting them lightly beforehand can enhance their flavor even further.
- Herbaceous Twist: Incorporate fresh, finely chopped herbs like chives, parsley, or dill into the mixture or as part of the outer coating for a burst of fresh flavor and vibrant color.
- Spicy Kick: For those who love a bit of heat, mix in finely diced pickled jalapeños, a pinch of cayenne pepper, or a dash of hot sauce. You could also use a pepper jack cheese along with the cheddar.
- Smoky Savory: Crumbled, cooked bacon bits are a classic addition. Mix them into the cheese ball or press them into the exterior for an irresistible smoky, salty crunch.
- Tangy Onion Boost: Beyond the dried minced onion, consider adding finely diced green onions or chives to the interior for a fresher, sharper onion flavor.
- Vegetable Medley: Finely chopped pimentos, sun-dried tomatoes (oil-packed, drained), or finely grated carrots can add color and subtle flavor.
- Spice Blends: Experiment with a teaspoon or two of taco seasoning for a Mexican-inspired cheese ball, or a ranch seasoning packet for a tangy, herb-infused version.
Remember, the goal is to enhance, not overpower, the delicious cheddar flavor. For even more inspiration and ideas for customizing your cheese ball, check out our comprehensive guide:
Easy Cheddar Cheese Ball: Simple Ingredients, Endless Variations.
Serving Suggestions: The Perfect Dippers
The right accompaniments can truly complete the
cheddar cheese ball experience. Offer a variety of textures and flavors to keep things interesting:
- Classic Crackers: Buttery Ritz crackers, whole-wheat crackers, water biscuits, or fancy artisanal crackers.
- Crunchy Pretzels: Pretzel sticks or mini twists provide a delightful salty crunch.
- Fresh Vegetables: Celery sticks, carrot sticks, cucumber slices, bell pepper strips (red, yellow, orange), and broccoli florets are all fantastic healthy options.
- Bread Accents: Thinly sliced baguette rounds, pita bread triangles (toasted or soft), or even pretzel bread bites.
- Sweet & Savory: For an unexpected but delicious pairing, try apple slices or pear slices. The fruit's sweetness complements the savory cheese beautifully.
Arrange your cheese ball on a beautiful platter surrounded by a colorful array of dippers to make a truly stunning presentation.
Tips for Success & Storage
Even for a recipe as straightforward as the
cheddar cheese ball, a few insider tips can ensure your creation is nothing short of perfect every time.
*
Softened Cream Cheese is Key: We can't stress this enough! Take your cream cheese out of the fridge at least an hour before you plan to mix. It makes the blending process incredibly easy and prevents lumps, yielding a super smooth, spreadable consistency.
*
Freshly Grated vs. Pre-Shredded: While convenience is tempting, freshly grating your cheddar cheese often results in a creamier texture when mixed and a better melt in your mouth. Pre-shredded cheeses sometimes contain anti-caking agents that can slightly alter the texture.
*
Don't Overmix: Mix until just combined and smooth. Overmixing can sometimes make the cheese ball a bit tough, though it's less of a concern with this simple recipe.
*
Making Ahead: This cheese ball is an excellent make-ahead appetizer. Prepare the cheese mixture, form it into a ball, and wrap it tightly in plastic wrap (without the outer coating) up to 2-3 days in advance. Store it in the refrigerator. Before serving, let it sit at room temperature for 15-20 minutes to soften slightly, then roll it in your chosen coating.
*
Storage for Leftovers: If (and that's a big "if") you have any leftovers, simply re-wrap the cheese ball tightly in plastic wrap or transfer it to an airtight container. It will keep well in the refrigerator for up to 3-5 days. Many find that the flavors meld even more beautifully after a day or two in the fridge, making day-two cheese ball just as delightful.
*
Shaping Perfection: If the mixture is too sticky to form a ball, chill it for 10-15 minutes. Lightly dampening your hands before shaping can also prevent sticking and help you achieve a smooth, perfect sphere.
Embracing these simple tips will ensure your
cheddar cheese ball is always a standout, whether it’s for a planned party or an unexpected treat.
The Ultimate Crowd-Pleaser, Ready in a Flash
There you have it – the ultimate guide to whipping up a classic
cheddar cheese ball in an incredible five minutes. From its humble ingredients to its effortless preparation, this recipe proves that sometimes, the most beloved dishes are the ones that demand the least amount of fuss. It’s a testament to simple, quality ingredients coming together to create something truly magical and memorable. Whether you stick to the classic formula or venture into exciting variations, this homemade cheese ball is guaranteed to be a hit at any gathering, a star on any snack table, and a delicious indulgence whenever the craving strikes. So go ahead, gather your ingredients, set your timer, and prepare to delight yourself and your guests with this timeless, irresistible creation.